Simply Strawberry Galette
As an Amazon affiliate, I earn from qualifying purchases.
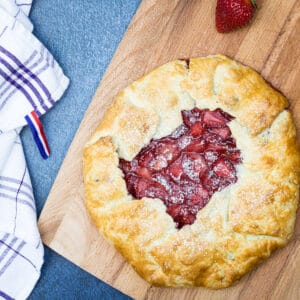
This Simply Strawberry Galette features an all-butter crust and an easy filling that lets that pure strawberry flavor shine!
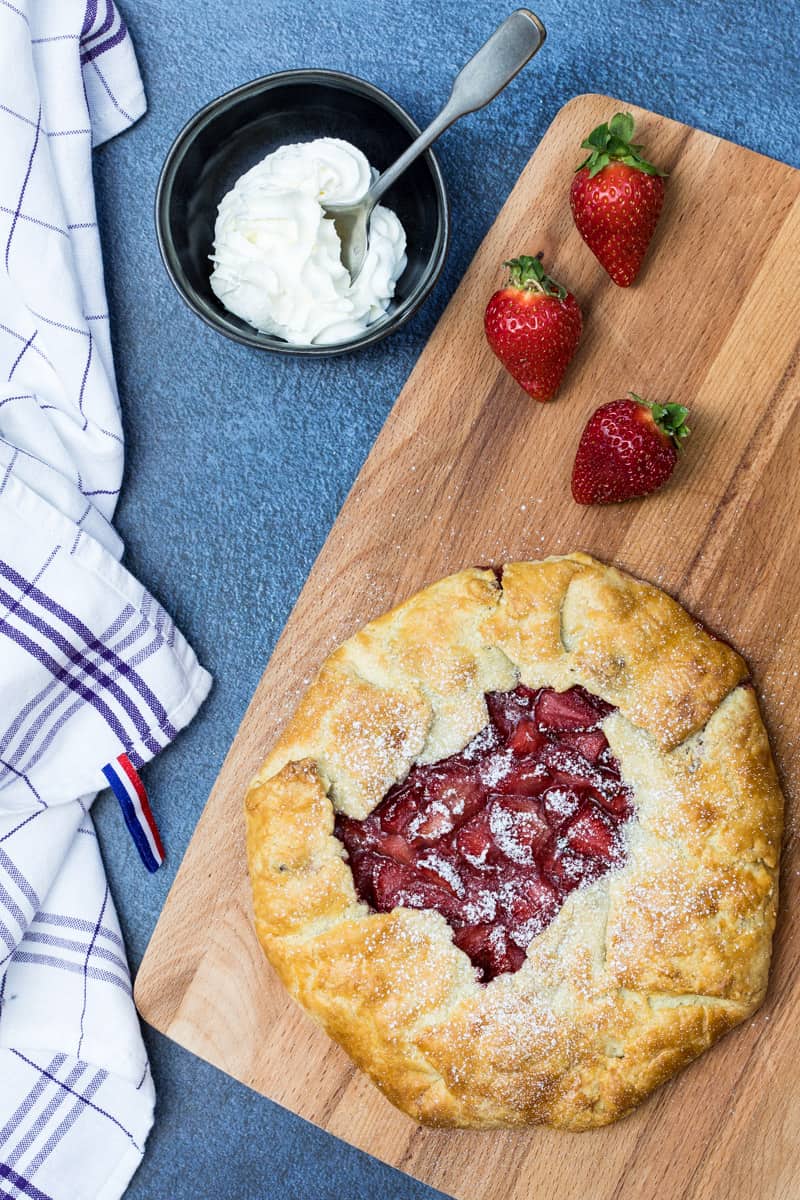
Table of Contents
A few years ago, I assisted Cathy Barrow with her fantastic cookbook, When Pies Fly, which includes several fabulous galette recipes. Her pie crust doughs are quite simply the best I have ever had, and that’s speaking as someone who was trained in French pastry. As I can’t improve on the best, I’m using her recipe for the dough for this galette, as well as some of her baking technique as well. I think you’ll enjoy the result.
Why Make This Recipe
- Highlight the Season: This recipe is absolutely perfect for showcasing those beautiful spring strawberries. If you want some other strawberry inspiration, check out my recipes for Strawberry Parfaits with Mascarpone Cream and Strawberry Mimosas.
- No Mixer Required: I’m making the pie crust by hand in this recipe—it’s surprisingly easy to do, which means you can make this dish anywhere!
- Simply Amazing Crust: This crust is flaky, buttery, and everything you want in a crust. While store-bought dough is always an option, I hope you’ll give homemade crust a try at least once and taste the difference!
🥗 Ingredients
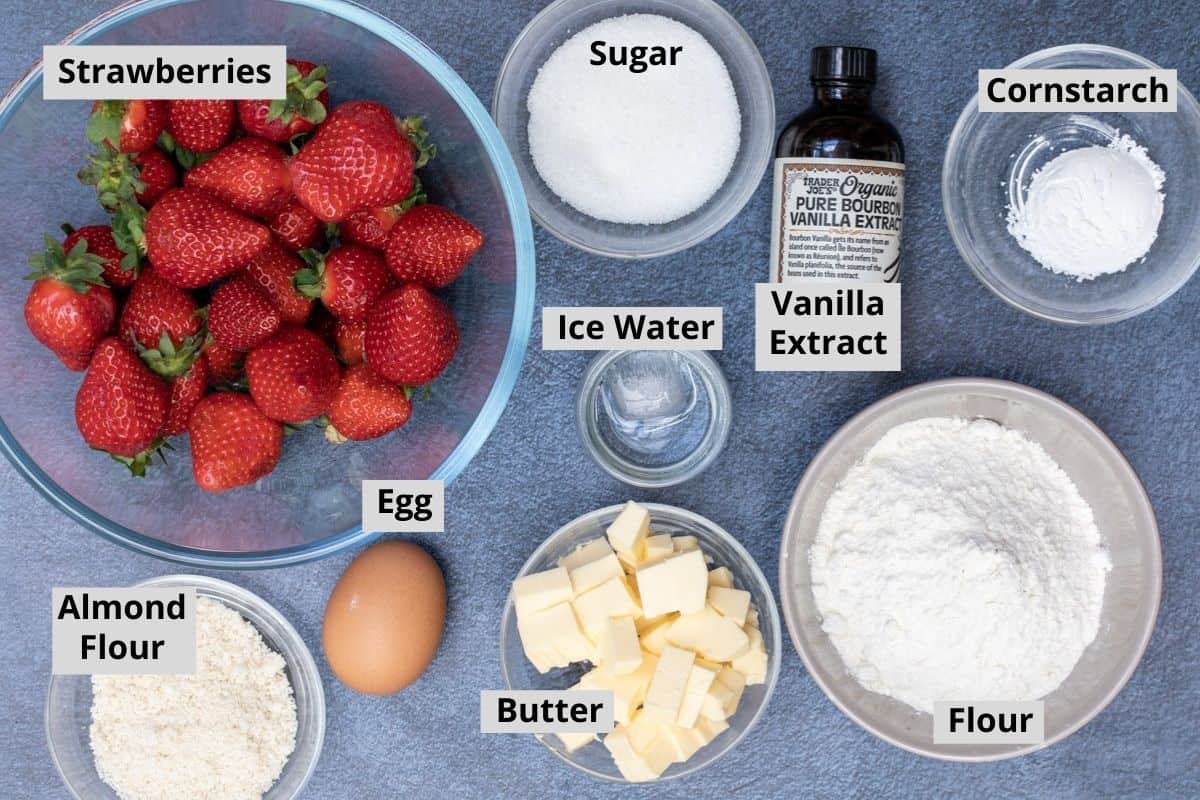
- Strawberries: This recipe uses fresh strawberries. You could combine or replace the strawberries with other fresh berries. Sliced peaches or nectarines would also be delicious. If you want to try this with frozen strawberries, defrost and pat them dry before using—they may not give you the same texture though when the galette is baked.
- Sugar: Try using a sugar substitute if that’s what you prefer—you might even try adding a bit of honey instead. Taste your strawberries before adding the sugar—if you have super sweet strawberries, you may find you don’t need to add much sugar at all.
- Almond flour: The almond flour in this recipe works to soak up some of the excess liquid released as the strawberries bake, to prevent a soggy crust. If you don’t have almond flour, try replacing with breadcrumbs.
🥣 Step-by-Step Instructions
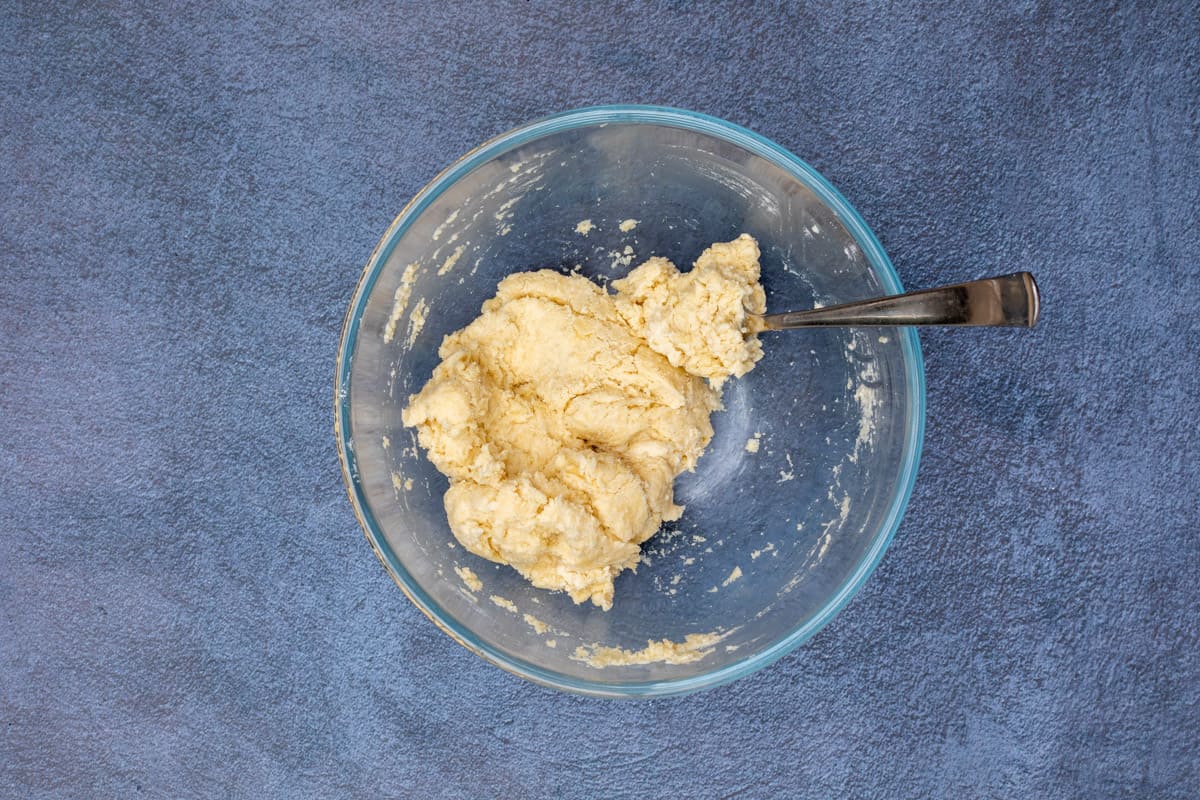
Let's start with making the crust. First, stir together flour and salt in a medium bowl. Cut butter into very small cubes and add to flour.
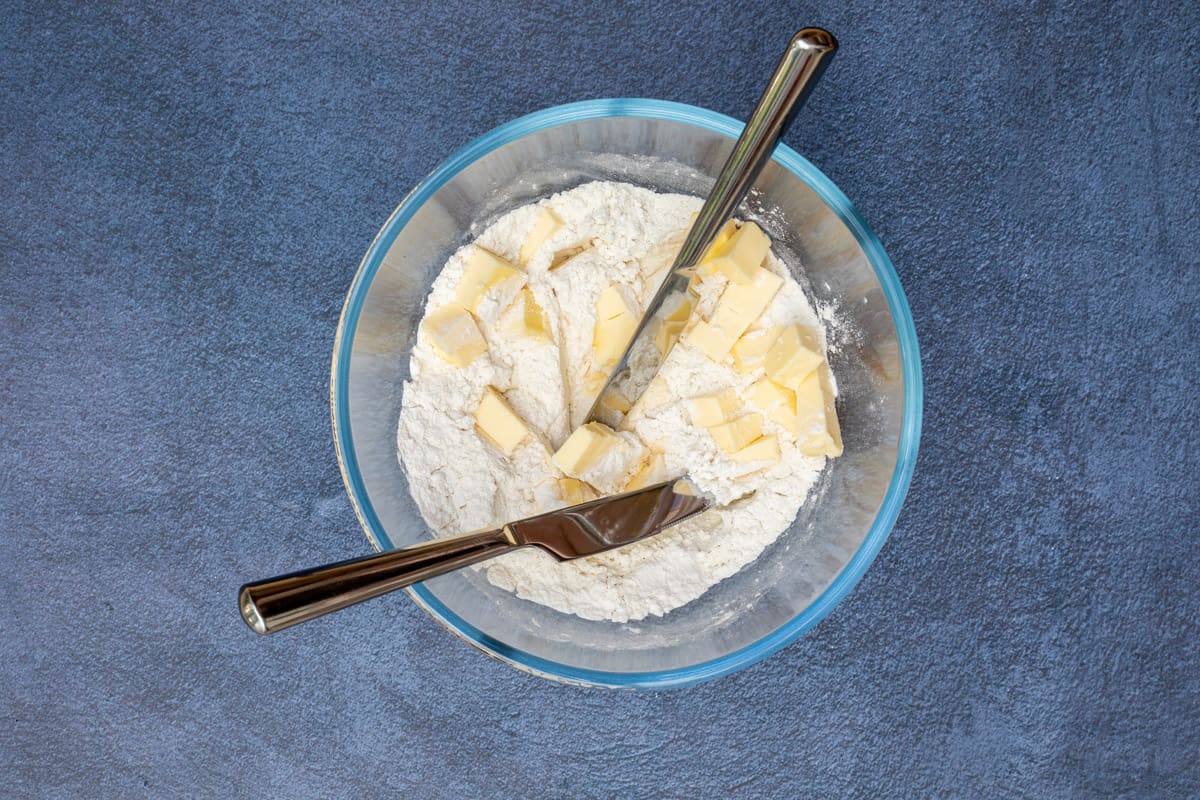
Using two knives or a pastry cutter, cut the butter into the flour until dough has a sandy texture, and the butter is in no-bigger-than-pea-sized chunks. You can also use your fingers, but do quickly, as warm fingers will start to melt the butter in the dough.
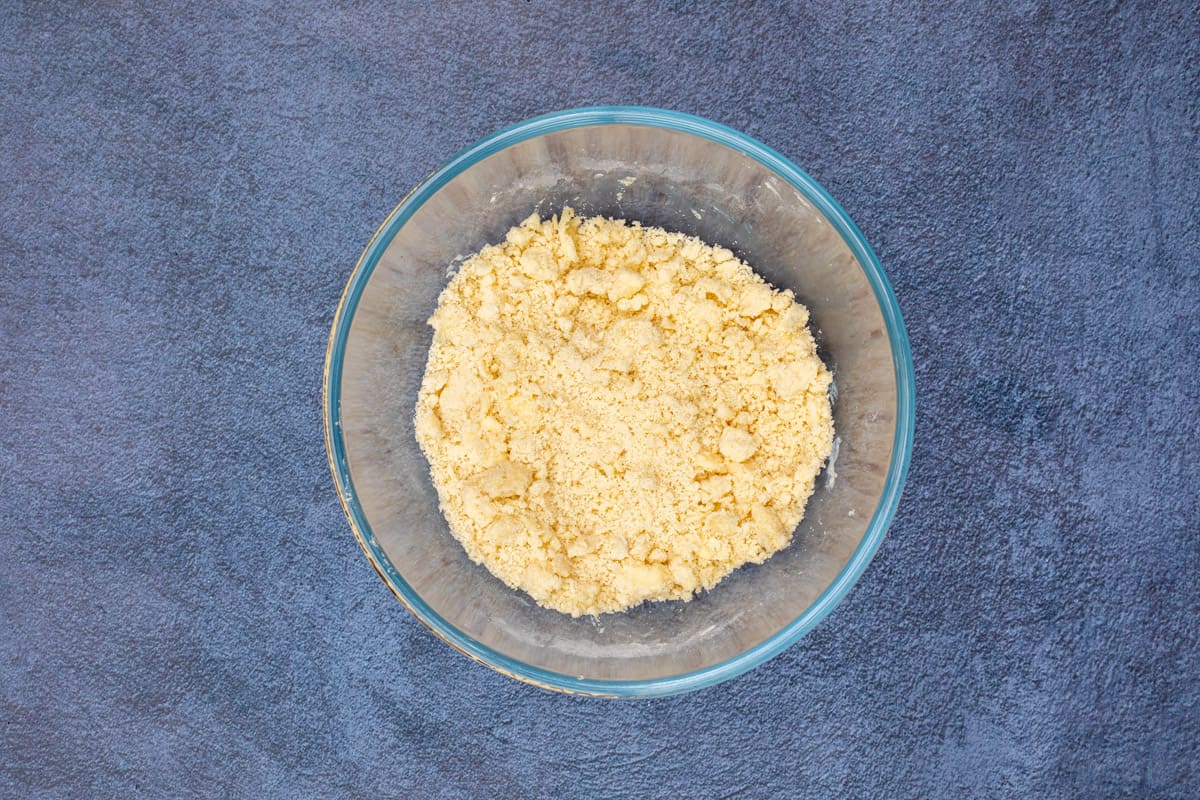
Pour in water, little by little, and stir with a fork until dough comes together (you may not need all the water).
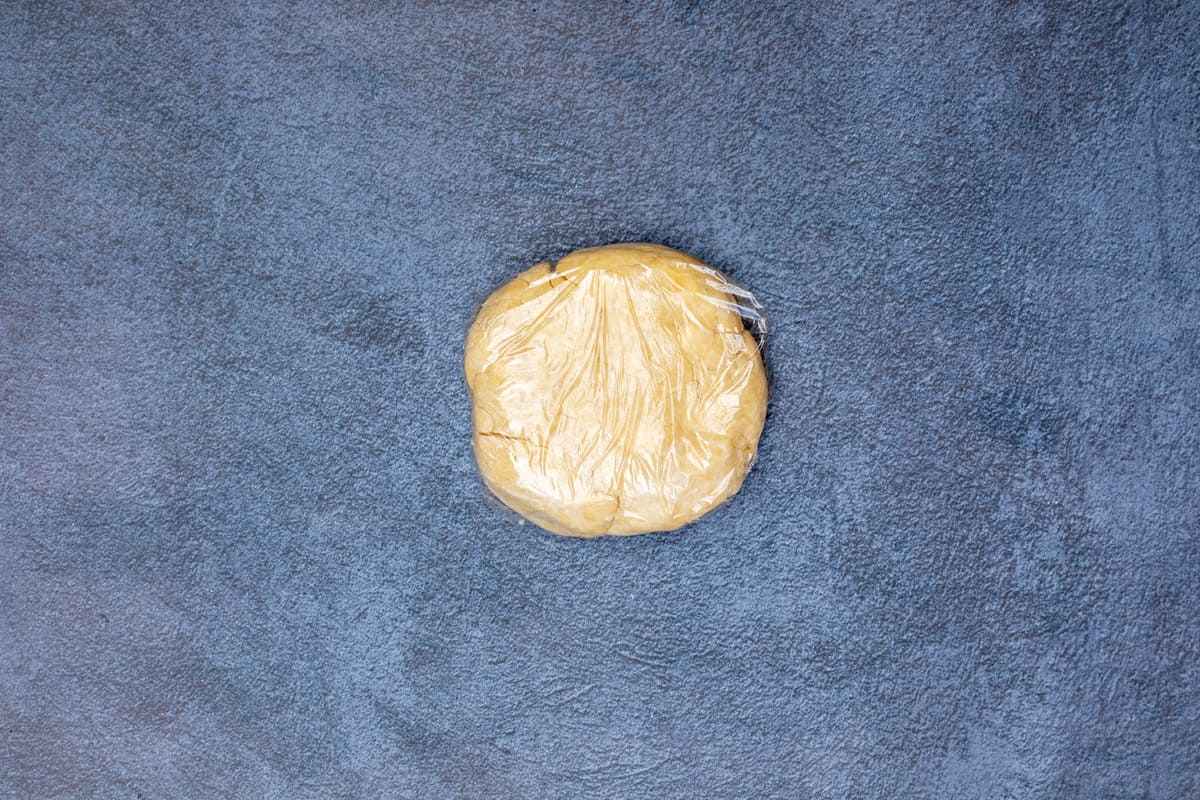
Pat dough into a round disk, then wrap in plastic wrap. Chill for at least 4 hours (24 hours is ideal).
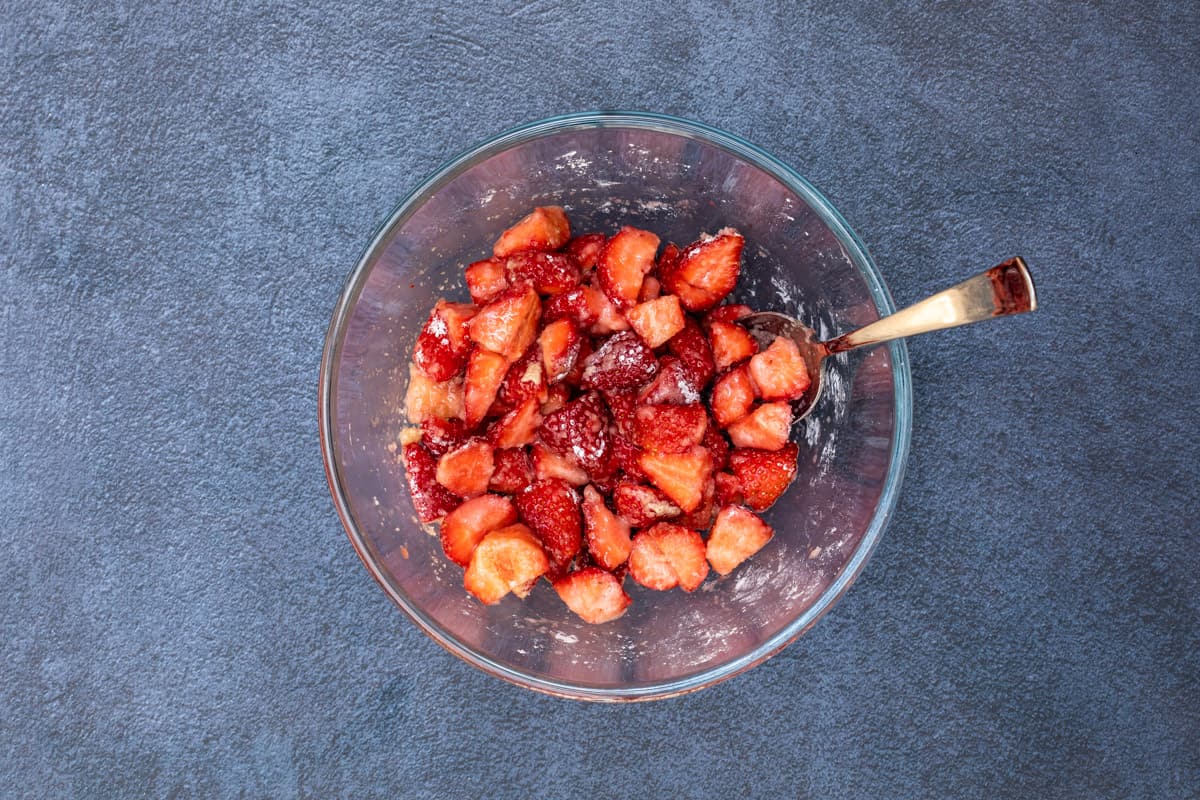
Rinse the strawberries and pat dry. Trim strawberries, then cut into bite-sized chunks. Add strawberries to a bowl and stir in sugar, cornstarch, and vanilla extract.
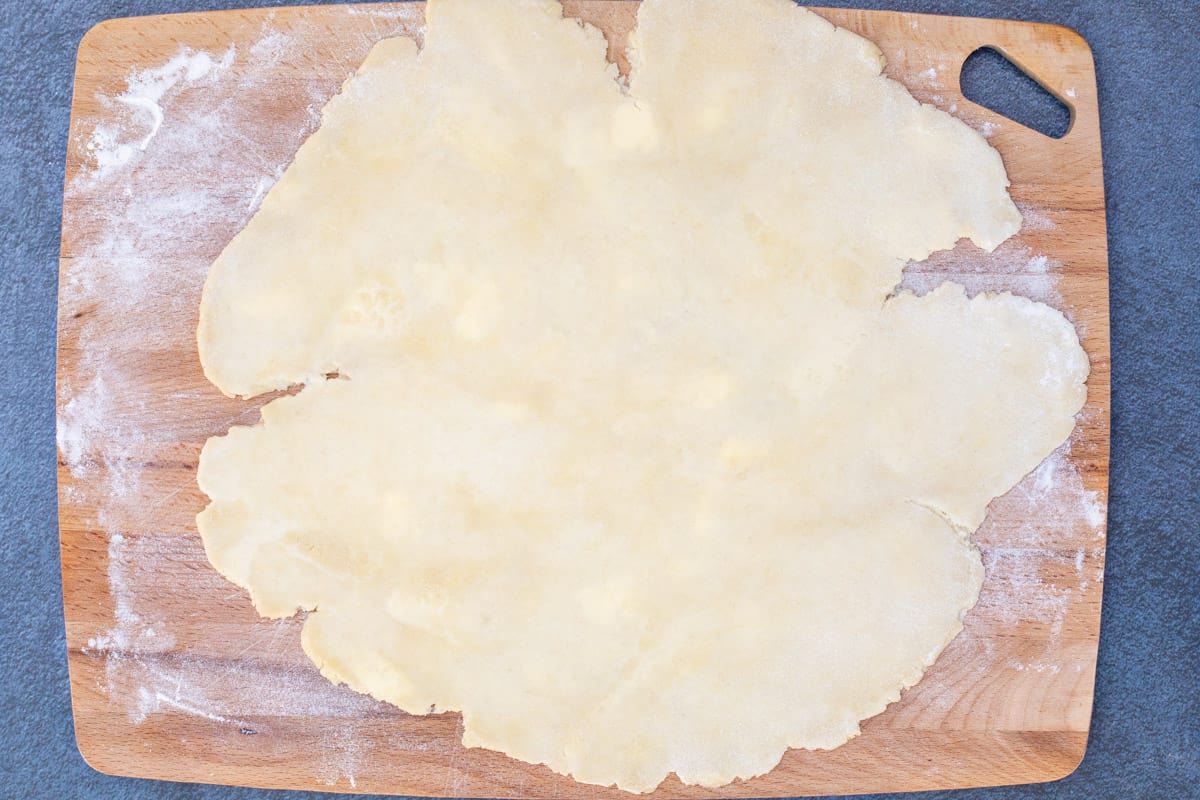
Let sit while you roll out the galette dough. Flour a large cutting board or clean countertop. Remove the dough from the refrigerator, and place on the board. Roll out dough in the shape of a circle, until it is about ⅛-inch thick. It will be around 12 inches in diameter.
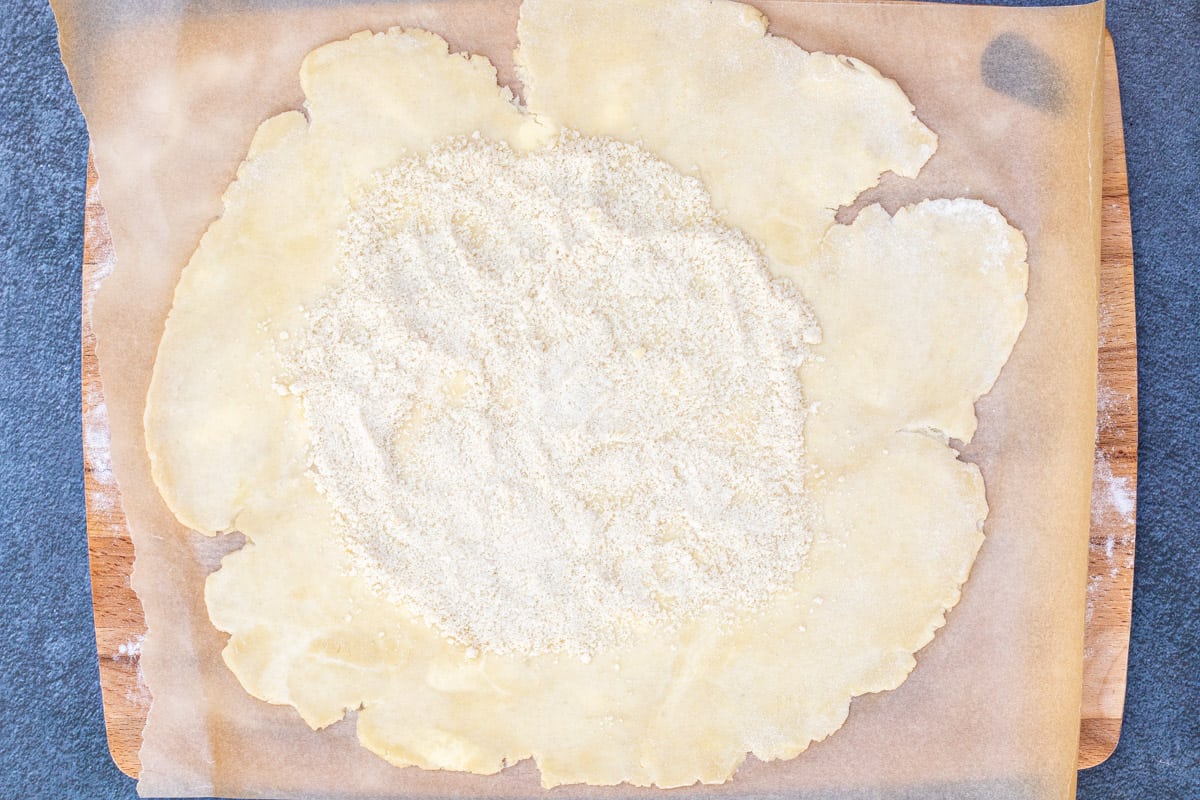
Carefully move dough to a small baking sheet or large plate lined with a piece of parchment paper. Sprinkle almond flour in a circle in the middle of the dough, leaving a 2-inch border around it.
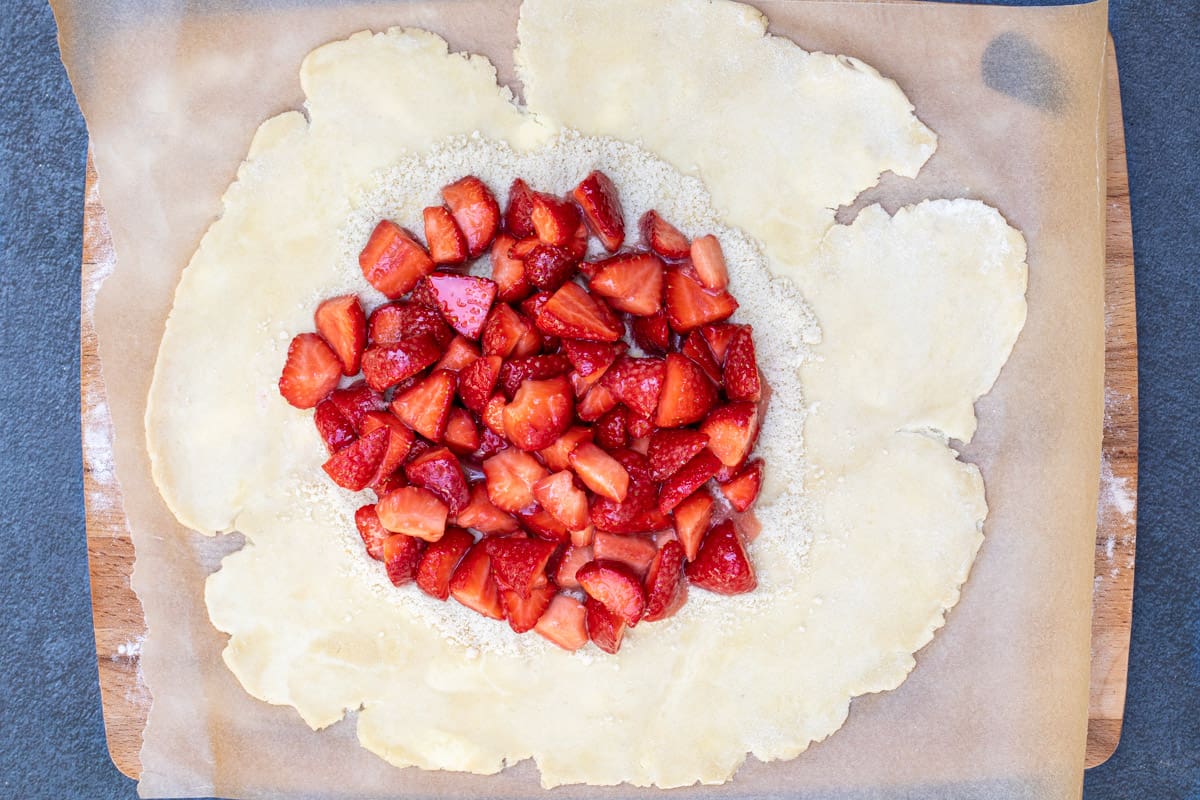
Arrange the strawberries over the almond flour. Including a bit of the syrup that was created as the strawberries sat in the sugar is fine, but don’t feel like you need to add all of it, as it can make your galette soggy.
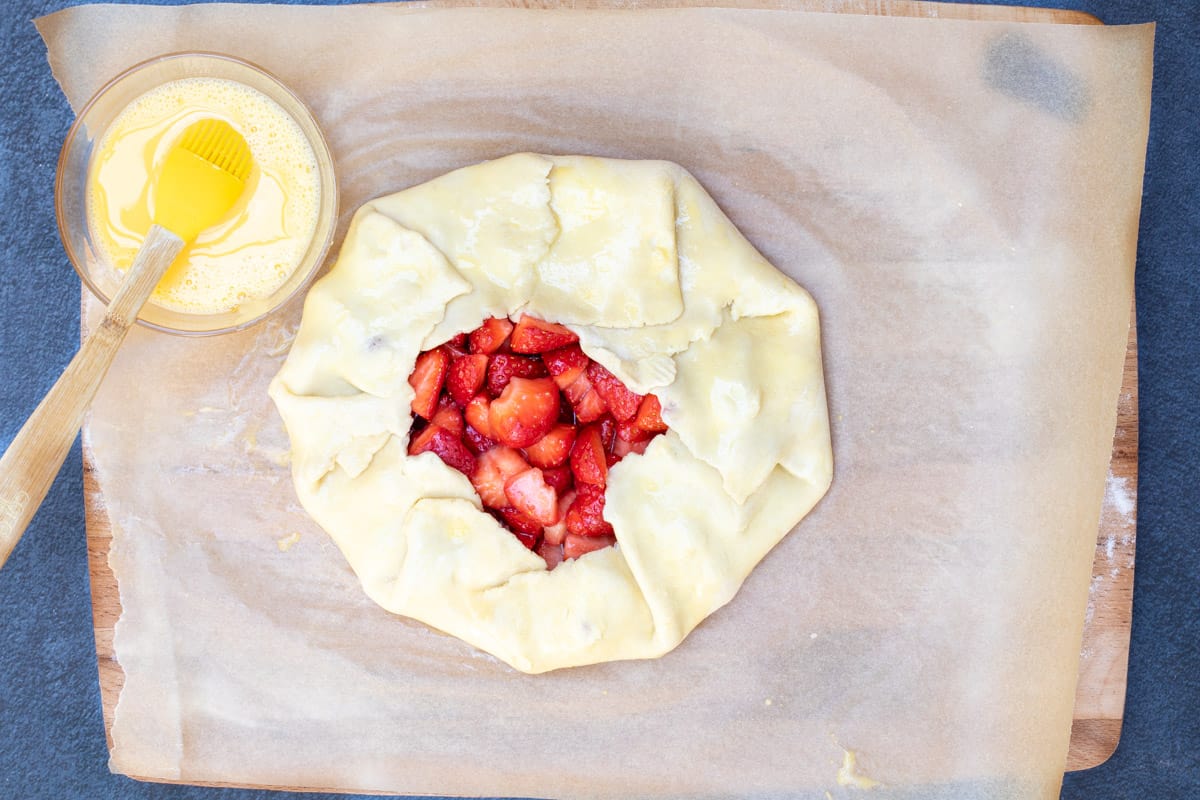
Now, moving in a circle, fold up the edges of the galette dough. Make sure to leave about half of the circle of strawberries uncovered.
Make an egg wash by whisking egg with 1 tablespoon of water and a pinch of salt. Using a pastry brush, brush the galette dough with the egg wash.
Move plate or baking sheet into the refrigerator and chill for 30 minutes. Meanwhile, put a large baking sheet into the oven, and preheat to 400 degrees. When galette has been chilled, carefully transfer it (on its parchment paper) onto the hot baking sheet. Bake for 35-40 minutes, until filling is bubbling and crust is golden brown.

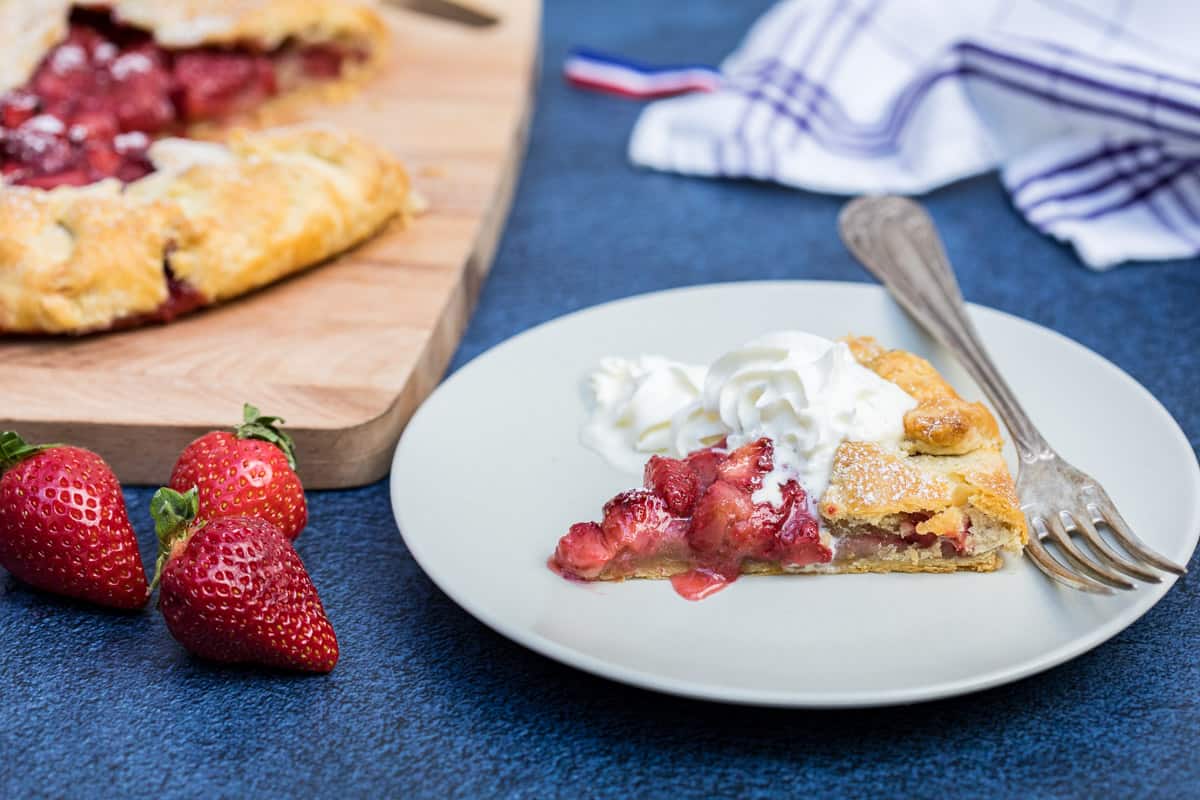
Let cool 15 minutes before slicing, then slide onto a wooden cutting board. (Letting it cool will help the galette to firm up again. Then, you will be able to cut a slice without the filling running off. A wooden cutting board will absorb moisture coming off the cooling galette.)
Serve with powdered sugar and/or whipped cream, if desired.
🧐 Recipe FAQs
The main difference between them is that pies are almost always baked in a pie pan, while galettes are baked freeform on a baking sheet.
In addition, while both pies and galettes can have sweet and savory fillings, it’s less common to see savory fillings in galettes. Traditionally, galettes are made with fruit, while pies have all sorts of traditional fillings.
I have a couple of tricks for this, both of which are used in this recipe. The first is to sprinkle the crust with almond flour before adding the filling, and the second is to preheat the baking sheet when you preheat the oven, so that you are adding your galette to a hot pan.
Other recipes suggest painting the crust with a layer of jam to help seal it and prevent the berry juices from soaking into the crust.
After baking, a galette will last up to 5 days in the refrigerator (wrapped in foil or in an airtight container). If you want to keep your galette for longer than that, you can freeze it for up to 3 months.
Thaw overnight in the refrigerator before serving. Leftover galette can be served warm or at room temperature. (Reheat in a 400-degree oven to warm up.)
👩🍳 Expert Tips
There are so many expert tips I could share from my time working with Cathy Barrow, but these are some of the highlights. If you are a pie fan, I highly recommend her books, which will give you much more detailed information about pie-baking technique.
Make sure your butter is very cold to start. Work quickly to chop it into pieces and then add to your dough. Or, chop it into pieces, then chill them for 15 minutes in the freezer before starting your dough.
If your dough starts to feel soft and/or warm at any point, stop what you are doing, and put it in the fridge. That might be while you are incorporating the butter and making the dough itself, or in the process of rolling it out.
The key to a good pie dough is pockets of butter that create steam and make the crispy layers in a crust. If your butter starts to melt into the dough, you will lose that. In addition, warm dough is hard to work with. It will not hold its shape as well when you are folding it around your filling.
You’ll note that my recipe calls for chilling the galette before baking it. In a pinch, you can bake your strawberry galette right away (especially if you have managed to keep your dough cold the entire time). However, chilling will help the galette keep its shape as it bakes so that your filling does not run all over your baking sheet.
Note: strawberry juice may leak out from a crack in the crust—it even did for me! Still absolutely delicious. Just move it to a cutting board and no one will know.
If you’d like to use a food processor to make this dough instead, you can absolutely do that. I use that method in this Apple Galette recipe, so check that out for instructions.
Also, the food processor is excellent for making a double batch of this dough. Double the ingredients, make the dough in the food processor, then divide into two dough balls before chilling.
Perfect for making two galettes, but you can also freeze the dough for up to 3 months. (Just wrap it well, and defrost in the refrigerator for about 24 hours before using.)
Other Fruit-Based Dessert Recipes
Want to find other recipes featuring fresh strawberries? Don't miss my Strawberry Mimosa or White Wine Sangria with Strawberries. Or, check out this Fresh Strawberry Pound Cake and these Strawberry Cream Cheese Muffins. So many great options for strawberry season!
Or, if you're looking for other berry desserts, try this Huckleberry Pie from our friends at Hilda's Kitchen Blog. And be sure to check out the following recipes:

Head to my Dessert archive for all sorts of other delicious treats.
If you try this Strawberry Galette recipe, I would love to hear from you! Leave a comment below—I read them all, and your feedback is invaluable to me.
And please follow along on Instagram, Pinterest, and Facebook or subscribe to my newsletter. I'd love to inspire you with more delicious, healthy, and seasonal recipes!
📖 Recipe
Want to Save This Recipe?
Enter your email & I'll send it to your inbox. Plus, get great new recipes from me every week!
By submitting this form, you consent to receive emails from Vanilla Bean Cuisine.
Simply Strawberry Galette
Ingredients
- 1 ⅓ cups (160g) all-purpose flour, plus extra for rolling dough
- Scant pinch of salt
- 8 tablespoons (113g) very cold unsalted butter
- ¼ cup (60ml) icy cold water
- 1 pound strawberries
- ¼ cup (56g) sugar
- 1 tablespoon cornstarch
- 1 teaspoon vanilla extract
- ¼ cup (23g) almond flour
- 1 egg
- Pinch of salt
- Powdered sugar or whipped cream to serve
Instructions
- Start the crust by stirring together flour and salt in a medium bowl.
- Cut butter into very small cubes.
- Using two knives or a pastry cutter, cut the butter into the flour until dough has a sandy texture, and the butter is in no-bigger-than-pea-sized chunks. You can also use your fingers, but do this quickly, as warm fingers will start to melt the butter in the dough.
- Pour in water, little by little, and stir with a fork until dough comes together (you may not need all the water).
- Pat dough into a round disk, then wrap in plastic wrap. Chill for at least 4 hours (24 hours is ideal).
- Rinse the strawberries and pat dry.
- Trim strawberries, then cut into bite-sized chunks.
- Add strawberries to a bowl and stir in sugar, cornstarch, and vanilla extract. Let sit while you roll out the galette dough.
- Flour a large cutting board or clean countertop.
- Remove the dough from the refrigerator, and place on the board.
- Roll out dough in the shape of a circle, until it is about ⅛-inch thick. It will be around 12 inches in diameter.
- Carefully move dough to a small baking sheet or large plate lined with a piece of parchment paper.
- Sprinkle almond flour in a circle in the middle of the dough, leaving a 2-inch border around it.
- Arrange the strawberries over the almond flour. Including a bit of the syrup that was created as the strawberries sat in the sugar is fine, but don’t feel like you need to add all of it, as it can make your galette soggy.
- Now, moving in a circle, fold up the edges of the galette dough, making sure to leave about half of the circle of strawberries uncovered.
- Make an egg wash by whisking egg with 1 tablespoon of water and a pinch of salt.
- Using a pastry brush, brush the galette dough with the egg wash.
- Move plate or baking sheet into the refrigerator and chill for 30 minutes.
- Meanwhile, put a large baking sheet into the oven, and preheat to 400 degrees.
- When galette has been chilled, carefully transfer it (on its parchment paper) onto the hot baking sheet.
- Bake for 35-40 minutes, until filling is bubbling and crust is golden brown.
- Let cool 15 minutes before slicing. (This will help the galette to firm up again, so that you can cut a slice without the filling running off.)
- Serve with powdered sugar or whipped cream, if desired.
Notes
Nutrition
Instagram Users: Now that you've made this recipe, tag me @vanillabeancuisine or #vanillabeancuisine because I'd love to see your results!

More About Molly

Cooking healthy(ish) meals with seasonal ingredients is my passion. Trained as a French pastry chef, I spent over 10 years as a personal chef. Here you'll find well-tested recipes that you and your family will love!


I have all the ingredients to make this strawberry galette but I don't have almond flour. Can I use regular flour instead?
Just leave out the almond flour, but try to drain most of the liquid from the strawberries. It's mostly there to soak up some of that extra juice. I don't recommend replacing it with regular flour, because that tends to get gummy. Thanks for asking!
can I make this recipe with regular flour not almond? If so, should I still add the flour to the crust and top with the berries?
Oh sure, just leave out the almond flour entirely. It just helps to sop up some of the juices from the strawberries. Try to take out the strawberries out of the syrup that was created by the sugar and place them on the dough, leaving the rest of the syrup in the bowl. That will help the galette not be soggy if you're not using the almond flour.
I absolutely love this recipe. Turns our great every time! The crust is so flaky and delicious. I have used different berry variations too. Love it! Try it, it is so easy and yummy, you won't be disappointed.
Thanks so much for commenting, Shannon! I love this crust too--just the best!
I get excited when I see a galette recipe because it’s something I’m actually capable of baking! I love the rustic quality of them. So pretty!
Yes, they make anyone look like a baking genius!