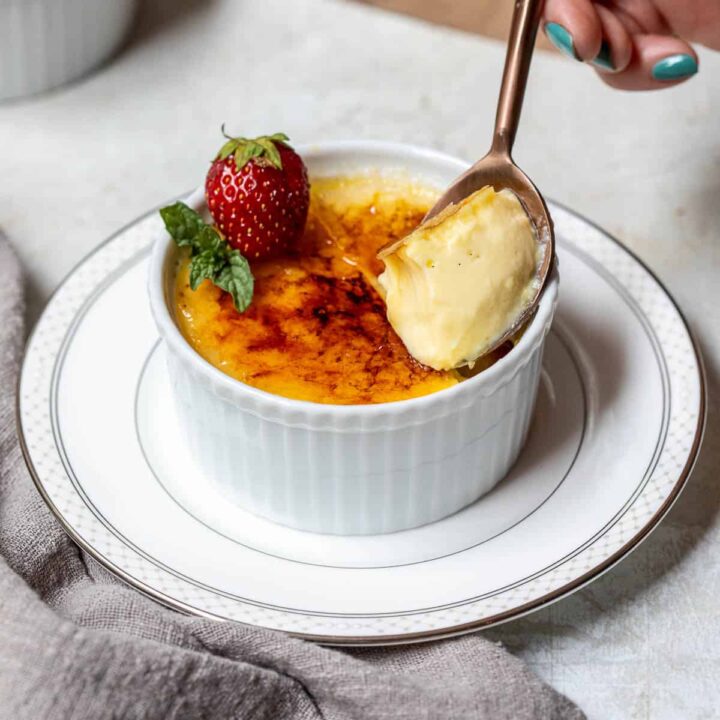
Want an impressive dessert, that is actually quite easy to make? Try this Crème Brûlée featuring a creamy vanilla custard topped with a shatteringly crisp sugar shell. Beyond delicious.

Honestly I would happily eat crème brûlée after every meal, but it makes an extra-special pairing with a romantic dinner. Try it after this Seared Filet Mignon, these Crab Cakes, or this Scallop Scampi.
Jump to:
Why Make This Recipe
Crème Brûlée was one of the first recipes we tackled in pastry school, and I remember being so surprised that this fancy-looking dessert was so easy. Yes, there are some pitfalls to watch out for, but the step-by-step instructions below won’t let you down. So what's great about this recipe?
- Classic French dessert that is deliciously decadent
- Only 6 ingredients
- Perfect for make-ahead
🥗 Ingredients
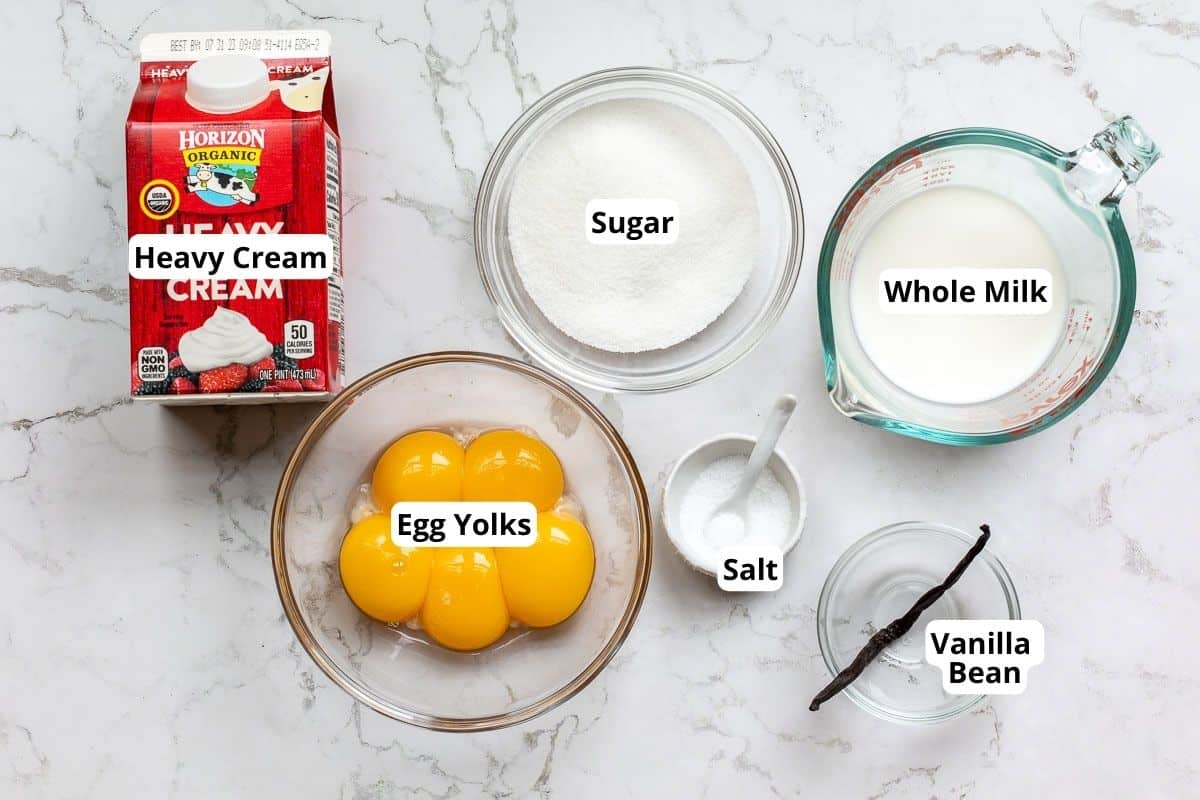
- Heavy Cream: Yes, you can substitute a little bit of light cream or whole milk instead, but the lusciousness of this dessert really comes from the heavy cream and the egg yolks. If you replace too much of the cream with milk, you may find that the custards are more difficult to set in the oven.
- Milk: Whole milk is the best for this recipe.
- Sugar: Good old granulated sugar is perfect in this recipe, since it dissolves so easily into the milk and cream. Also, it is the easiest to melt with a torch when you are making the top crust.
- Vanilla Bean: Using seeds scraped from a vanilla bean will give you the best vanilla flavor. You can replace with a teaspoon of vanilla extract in a pinch though!
- Egg Yolks: Just the yolks here—they create a beautiful custard with the cream and milk.
🥣 Step-by-Step Instructions
Step 1: Preheat oven to 325 degrees.
Step 2: Pour 2 cups heavy cream and ½ cup whole milk into a saucepan, then add ½ cup granulated sugar. Split a vanilla bean and scrape seeds into cream. Drop vanilla bean pod into cream as well.
Heat over medium, whisking frequently to dissolve the sugar. Turn off the heat when the cream just starts to steam and small bubbles start to form around the edges (about 5 minutes). Let cool for 2 minutes.

Step 3: Meanwhile, add 5 egg yolks to a large measuring cup with a spout and whisk until smooth.
Step 4: Pour in a few ounces of the hot cream mixture while whisking. Continue whisking until well-combined.

Step 5: Slowly pour the rest of the cream mixture into the egg yolks while stirring constantly. Whisk in ¼ teaspoon kosher salt. If the mixture looks particularly foamy, you can skim the foam off the top before pouring into ramekins so that you won’t have bubbles on the top of your custards.
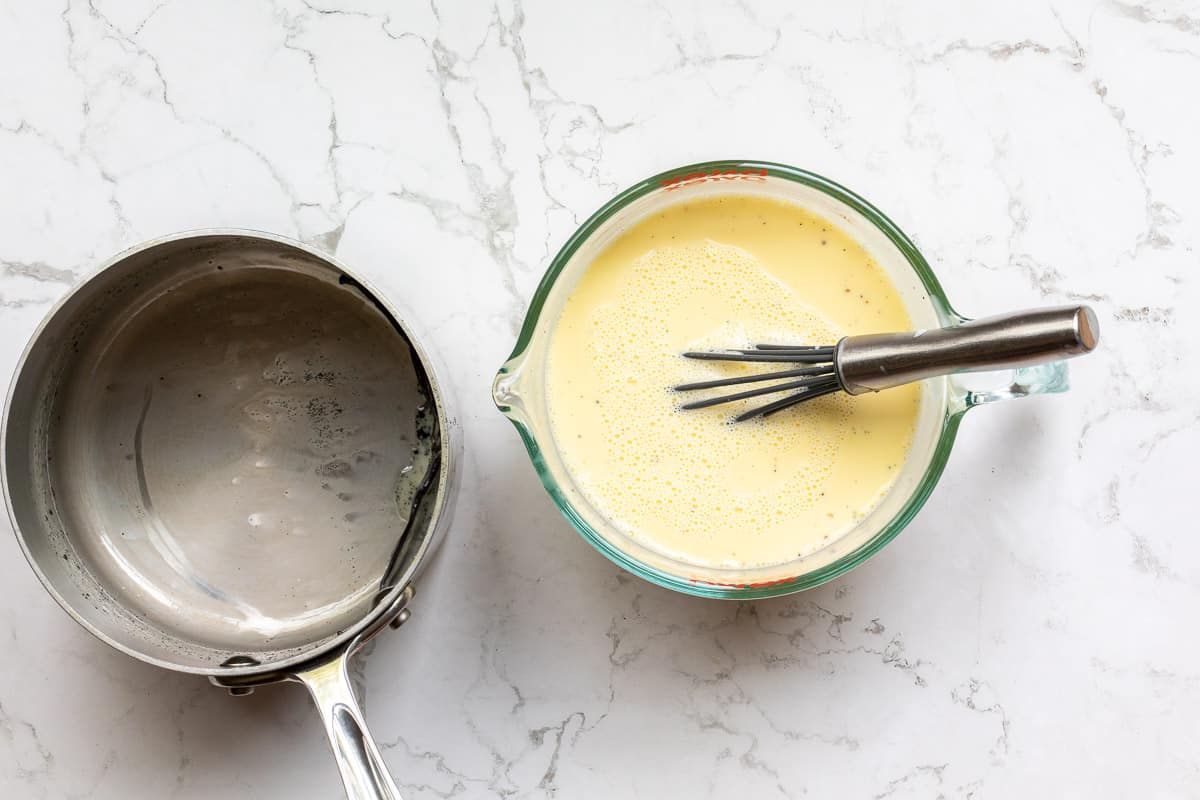
Step 6: Fill a kettle with water and heat to a boil.
Step 7: Fill 6 4-ounce ramekins with mixture, and put ramekins in a 9x13 baking dish.

Step 8: Put baking dish in oven. Pour very hot water (just off the boil) around the ramekins, about ¾ of the way up the sides.
Step 9: Bake for 30-35 minutes, or until custards are set, but still slightly jiggly in the middle. Remove baking dish carefully from the oven. Then remove ramekins and place on a cooking rack. When cooled to room temperature, refrigerate for at least 3 hours and up to 3 days.

Step 10: When ready to serve, sprinkle 2 teaspoons sugar evenly over the top of each custard’s surface, covering completely. Hold a kitchen blowtorch a couple of inches from the surface of the custard, and turn on.
Caramelize the sugar by moving the blowtorch in circles over the custard until the sugar melts and browns.

Repeat for remaining custards.
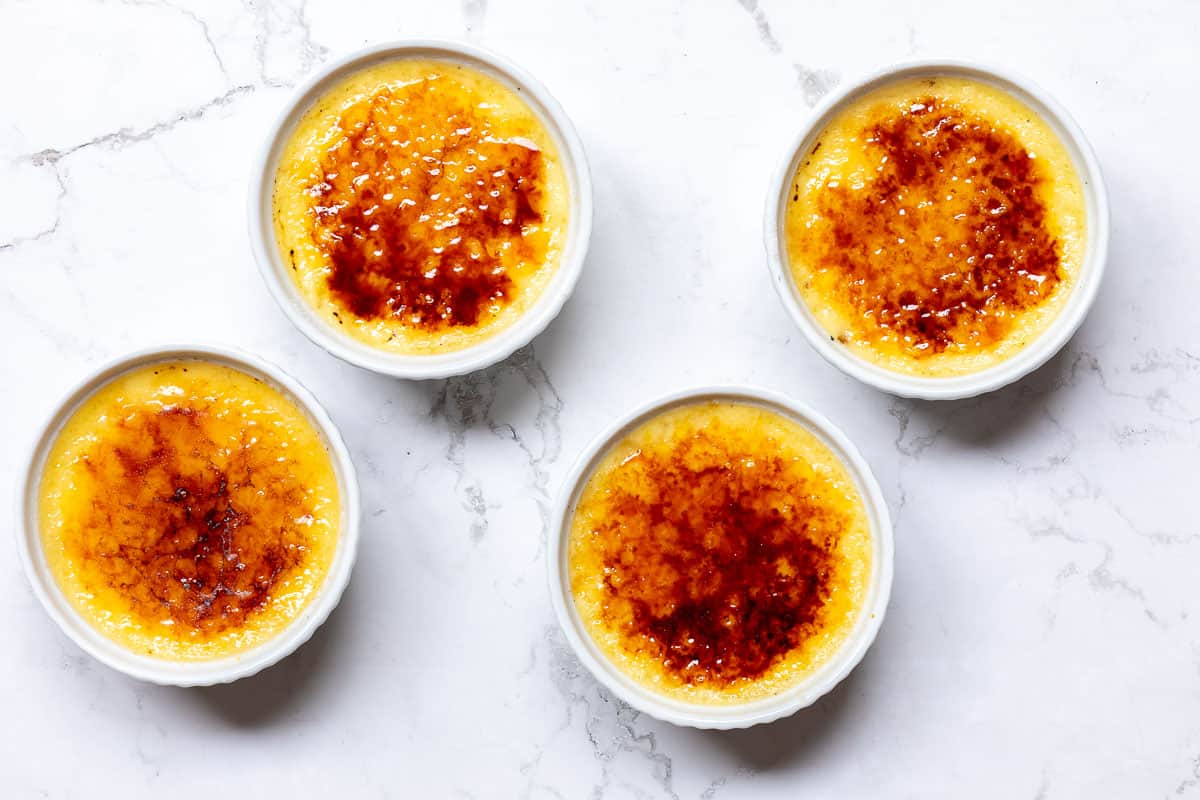
You can serve crème brûlée immediately, or refrigerate after caramelizing the sugar so that the custards have time to firm up again. 30-60 minutes is perfect, and don’t chill longer than 3 hours or the sugar topping will soften.
🧐 Recipe FAQs for Vanilla Crème Brûlée
Crème brûlée is a French dessert that translates to “burnt cream.” It consists of a custard topped with a sugar crust that has been caramelized. Vanilla is the classic flavor for crème brûlée, but other flavors can be used as well.
Yes! This is a great dessert if you are a gluten-free eater. Pair it with some fresh berries, and you have the perfect gluten-free dessert.
Yes, you can make the custards up to 3 days in advance. In addition, you can brûlée the sugar on top up to 3 hours before serving (though we recommend serving right after brûlée-ing or chilling for just 30-60 minutes afterwards).
👩🍳 Expert Tips
Adding the hot cream just a little bit at first, and then slowly whisking it into the egg yolks ensures that you won’t curdle the eggs. (This is called tempering eggs.) If you do see small pieces of egg in your custard, you can strain the mixture through a fine-mesh sieve to remove them.
Don’t whisk your egg yolks with the hot cream/sugar mixture too vigorously—this makes the mixture too foamy on top. (Though if this does happen, just skim off as much of the foam as you can.)
Wondering if the water bath is really necessary? Yes, it is! The water bath makes sure the custards cook slowly and gently so they don’t overheat and break.
Don’t overcook your custards. You want them to wobble or jiggle when you shake the side a bit. If the center is sloshing around, they are not fully cooked. That said, don’t wait until they are fully set before pulling out of the oven—they will continue to firm up as they cool.
If you want to be extra sure, use a high-quality instant read thermometer to test the center temperature. The custard is done when it reaches between 170 and 180 degrees.
Don’t have a crème brûlée torch? You can put the custards under the broiler instead. Make sure the ramekins are about 3-4 inches from the heating coil, and watch carefully so they don’t burn. Broilers can be higher risk since they will take longer to caramelize, and in the meantime warm the custard up so much that it curdles.
Your custards will cook more quickly if you are using a standard crème brûlée mold which is more shallow than a regular ramekin. Start checking them after about 20 minutes.
Now that you've got this technique down, you can play around with different flavors. Start with this Matcha Crème Brûlée.
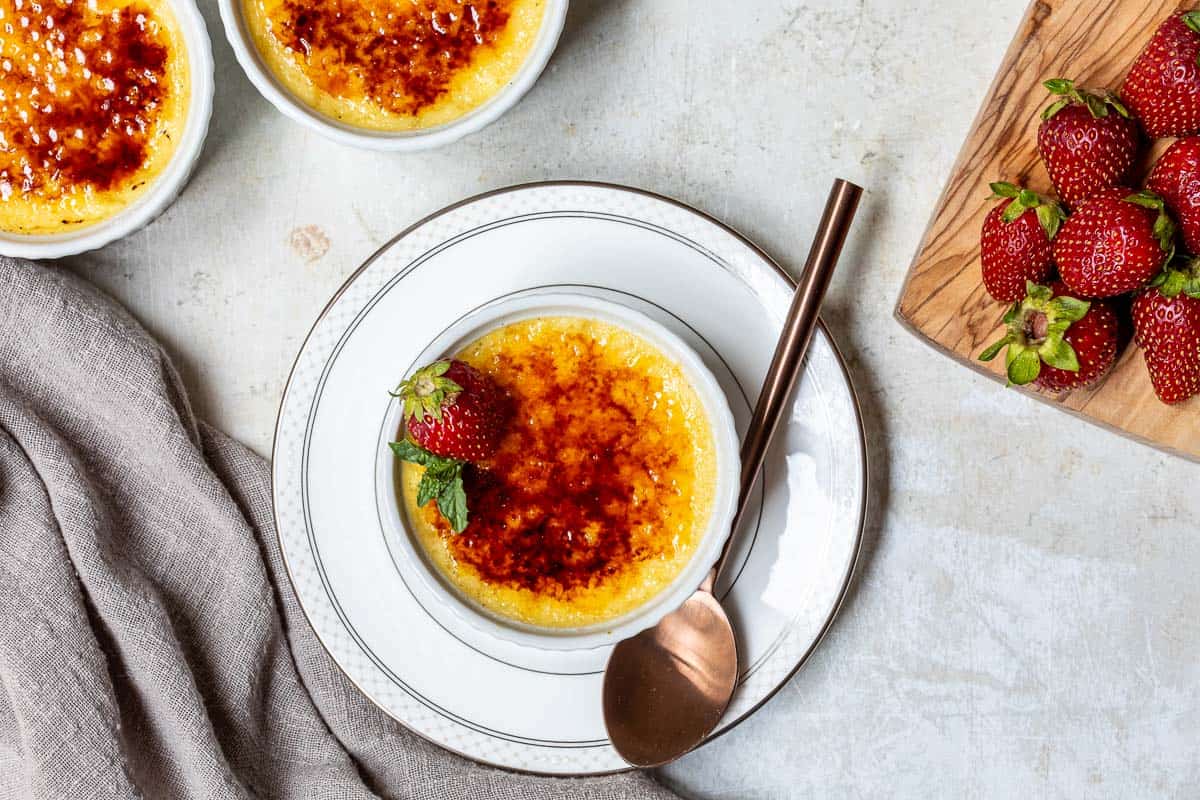
Other Delicious French Desserts
Now that you’ve tried this crème brûlée, check out some of my other favorite French dessert recipes. All delicious, and don’t require complicated techniques.
If you try this vanilla Crème Brûlée recipe, we would love to hear from you! Please rate this recipe and leave a comment below—your feedback is invaluable to us.
And please follow along on Instagram, Pinterest, and Facebook or subscribe to our newsletter. We’d love to inspire you with more delicious, healthy, and seasonal recipes!
Want to Save This Recipe?
Enter your email & I'll send it to your inbox. Plus, get great new recipes from me every week!
By submitting this form, you consent to receive emails from Vanilla Bean Cuisine.
📖 Recipe
Vanilla Bean Crème Brûlée
Want an impressive dessert, that is actually quite easy to make? Try this Crème Brûlée featuring a creamy vanilla custard topped with a shatteringly crisp sugar shell.
Ingredients
- 2 cups heavy cream
- ½ cup whole milk
- ½ cup sugar (115g)
- 1 vanilla bean
- 5 egg yolks
- ¼ teaspoon kosher salt
- 12 teaspoons granulated sugar, for topping
Instructions
- Preheat oven to 325 degrees.
- Pour heavy cream and milk into a saucepan, then add sugar.
- Split vanilla bean and scrape seeds into cream. Drop vanilla bean pod into cream as well.
- Heat over medium, whisking frequently to dissolve the sugar.
- Turn off the heat when the cream just starts to steam and small bubbles start to form around the edges (about 5 minutes). Let cool for 2 minutes.
- Meanwhile, add egg yolks to a large measuring cup with a spout and whisk until smooth.
- Pour in a few ounces of the hot cream mixture while whisking. Continue whisking until well-combined.
- Slowly pour the rest of the cream mixture into the egg yolks while stirring constantly.
- Whisk in salt.
- If the mixture looks particularly foamy, you can skim the foam off the top before pouring into ramekins so that you won’t have bubbles on the top of your custards.
- Bring a kettle to boil with hot water.
- Fill 6 4-ounce ramekins with mixture, and put ramekins in a 9x13 baking dish. Put baking dish in oven.
- Pour very hot water (just off the boil) around the ramekins, about ¾ of the way up the sides.
- Bake for 30-35 minutes, or until custards are set, but still slightly jiggly in the middle.
- Remove pan carefully from the oven. Then remove ramekins and place on cooling rack. Let cool until room temperature, then refrigerate for at least 3 hours and up to 3 days.
- When ready to serve, sprinkle 2 teaspoons sugar evenly over the top of each custard’s surface, covering completely.
- Hold a kitchen blowtorch a couple of inches from the surface of the custard, and turn on. Caramelize the sugar by moving the blowtorch in circles over the custard until the sugar melts and browns.
- Repeat for remaining custards.
- Serve immediately, or put custards back in the refrigerator for up to an hour.
Notes
Storage Tips:
After brûlée-ing your custards, don't chill longer than 3 hours maximum or the sugar topping will soften. You can, however, chill the custards for up to 3 days before making the topping. Cover with plastic wrap and keep refrigerated.
Expert Tips:
This recipe makes 6 4-ounce crème brûlée servings, but depending on the size of your ramekins, you may want to do 4 6-ounce servings instead. If you have traditional shallow crème brûlée ramekins, like those pictured below, they are 8-ounce servings and will cook faster than the deeper 4-ounce and 6-ounce ramekins.
Note that the water bath is necessary because it ensures the custards cook slowly and gently, so they don’t overheat and break.
Don’t overcook your custards. You want them to wobble or jiggle when you shake the side a bit. If the center is sloshing around, they are not fully cooked. That said, don’t wait until they are fully set before pulling out of the oven—they will continue to firm up as they cool.
If you want to be extra sure, use a high-quality instant read thermometer to test the center temperature. The custard is done when it reaches between 170 and 180 degrees.
Don’t have a crème brûlée torch? You can put the custards under the broiler instead. Make sure the ramekins are about 3-4 inches from the heating coil, and watch carefully so they don’t burn. Broilers can be higher risk since they will take longer to caramelize, and in the meantime warm the custard up so much that it curdles.
Recommended Products
As an Amazon Associate and member of other affiliate programs, I earn from qualifying purchases.
-
DOWAN 4 oz Ramekins - Ramekins for Creme Brulee Porcelain Ramekins Oven Safe, Classic Style Ramekins for Baking Souffle Ramekins Ramekins Bowls, Set of 6, White
-
Sondiko Butane Torch S400, Refillable Kitchen Lighter, Fit All Butane Tanks Blow Torch with Safety Lock and Adjustable Flame for Desserts, Creme Brulee, and Baking—Butane Gas Is Not Included
Nutrition Information:
Yield: 6 Serving Size: 1Amount Per Serving: Calories: 425Total Fat: 33gSaturated Fat: 20gTrans Fat: 1gUnsaturated Fat: 11gCholesterol: 245mgSodium: 90mgCarbohydrates: 29gFiber: 0gSugar: 28gProtein: 5g
Nutrition information is provided as a general reference for users courtesy of the online nutrition calculator Nutritionix.
Instagram Users: Now that you've made this easy crème brûlée recipe, tag us @vanillabeancuisine or #vanillabeancuisine because we’d love to see your results!




Leave a Reply